
April 5th
Modeling, Moderate, Product design, Tutorials
This article has been viewed 35014 times. You can leave a response, or trackback from your own site.

Help modeling air circulator


STEP 2
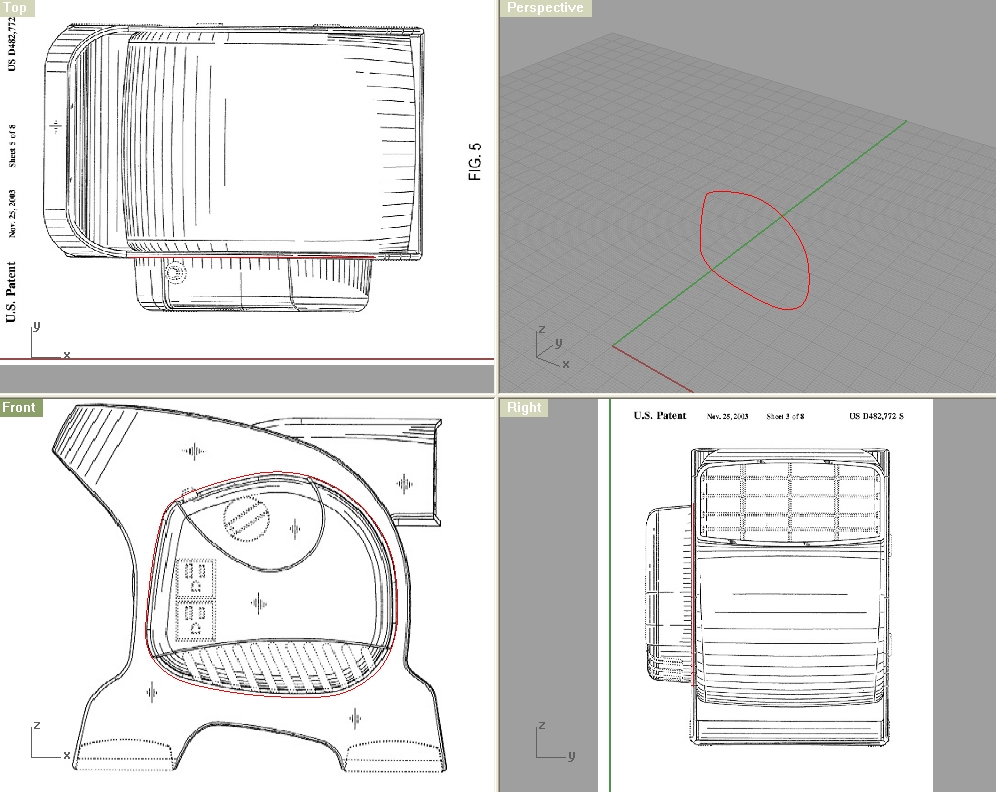
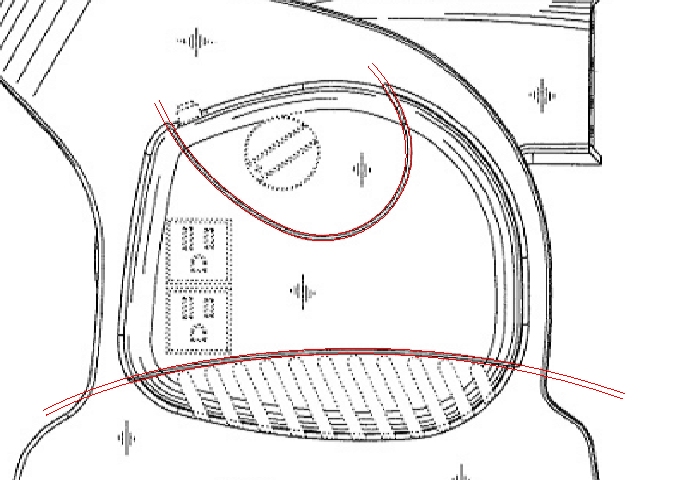
In this step, we will be creating that curvy part on the right of our air circulator.
First, from Front viewport make a curve using InterpCrv command and close it. You can move it a bit inside the shell of our part we made in the previous step.
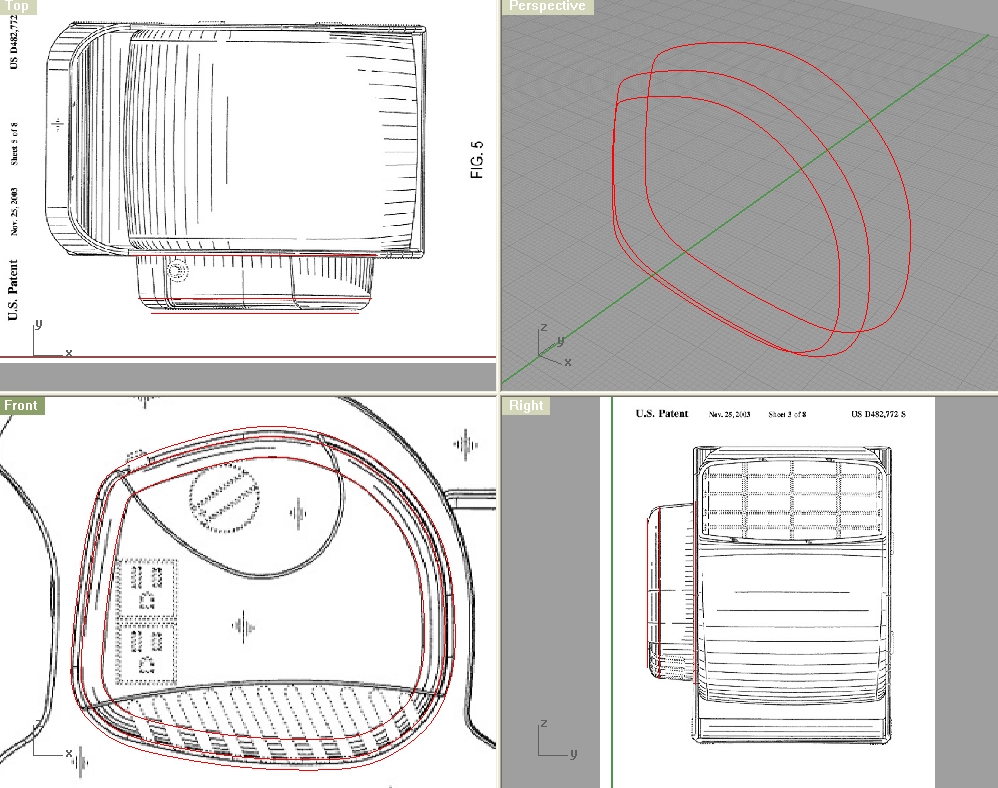
Next, I have offset that curve first by 1 unit inside, and then by 3 units inside. Then I positioned them according to the image below:
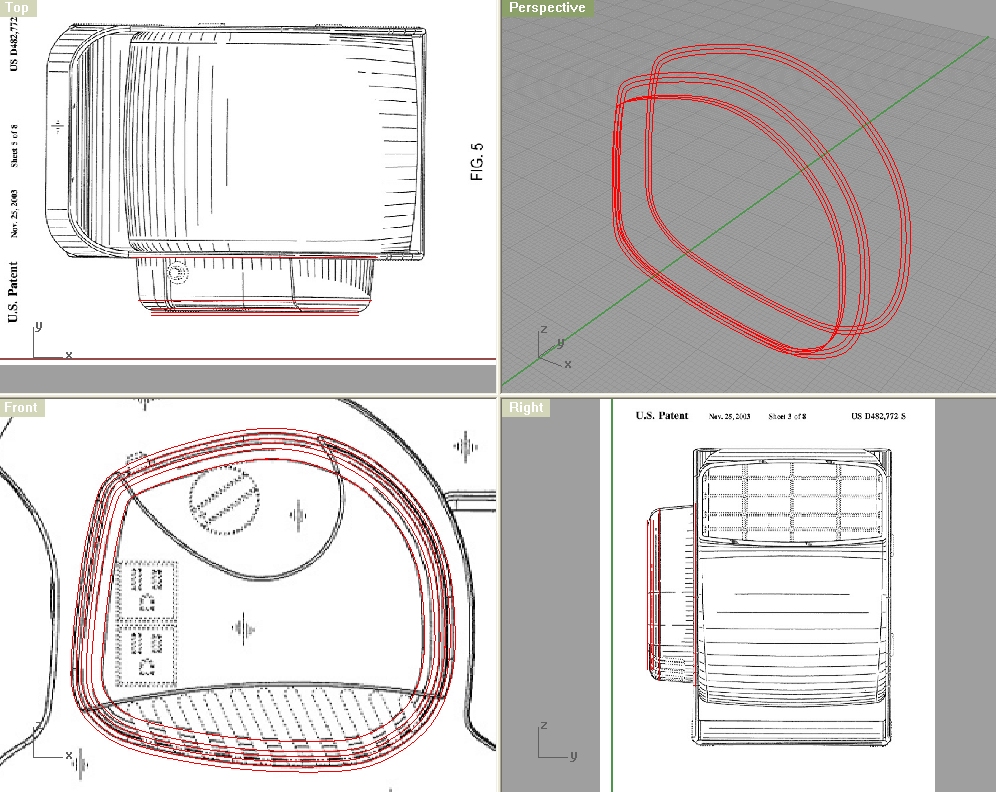
Next, offset base 2 curves inside by 0.5units and copy the top curve and move it to the inside by 0.5 units. Do this one more time, so you have 3 sets of 3 curves.
Create a surface between base 2 curves with Loft, and cap the top curves with Surface From Planar Curves (PlanarSrf).
I’ve hidden the inside set of 3 curves, so I have only two sets of 3 curves. First, I’ll loft the inside set. Then PlanarSrf the inner top curve, and blend surface (blendsrf) two surfaces:
You must repeat this step, but this time for outer 3 curves.
Next, create two curves like on the image below, and offset them by 0.5 units.
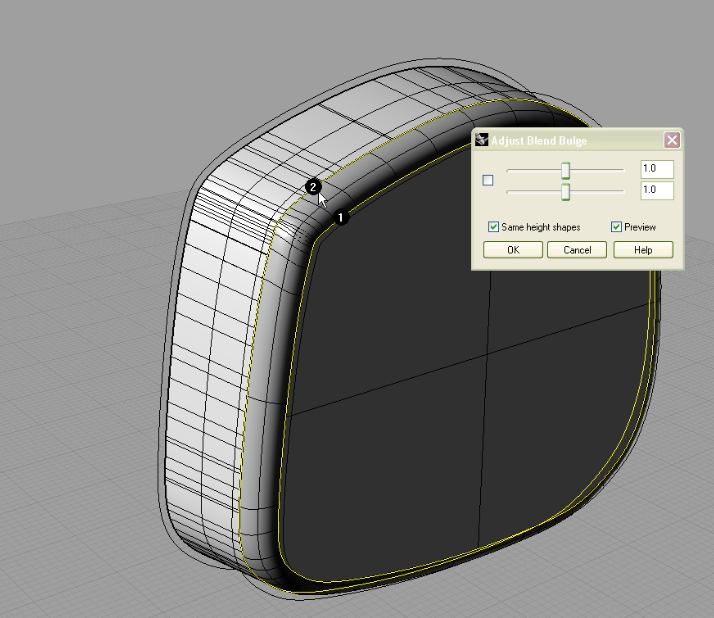
Now, you have two surfaces, and two sets of two curves. You need to trim the outer surface with inner curves, and inner surface with outer curves.
Blend those edges with BlendSrf command, and join everything. Turn off the option Same height shapes.
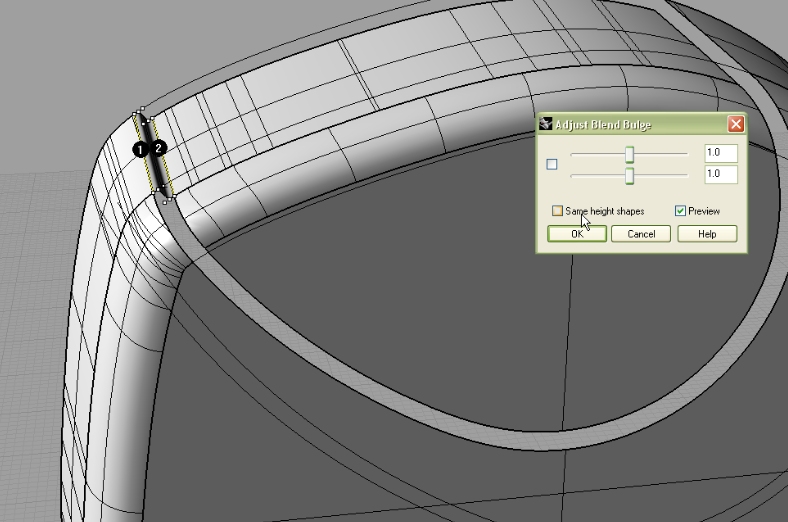
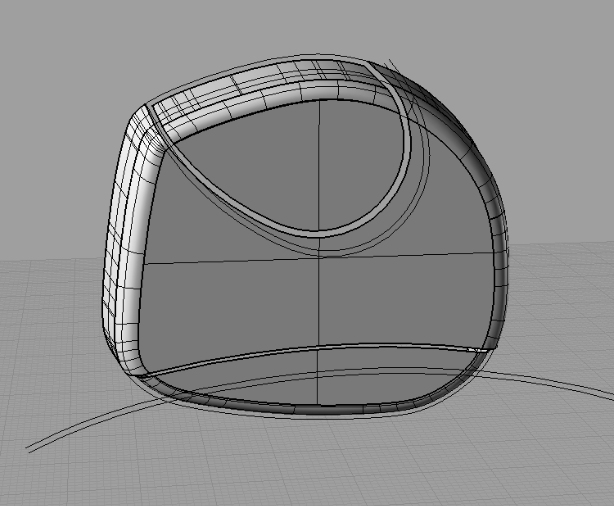
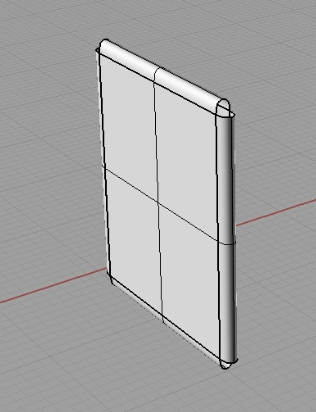
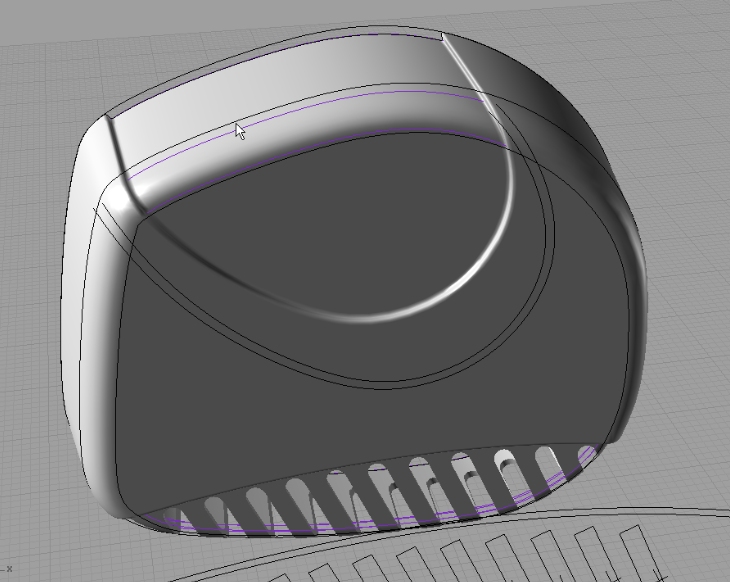
You should end up with this:
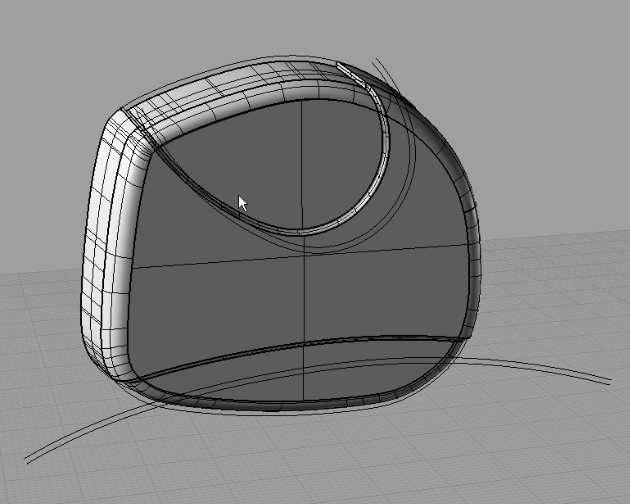
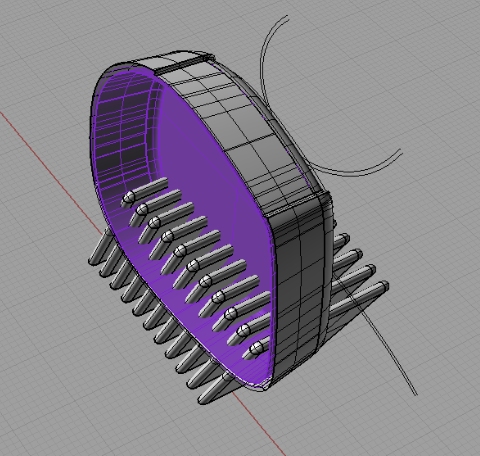
Now you can unhide (Show) the far inner set of 3 curves, and Loft two, and cap the top, and blend surfaces. Just like we did on the other 2 sets of curves before.
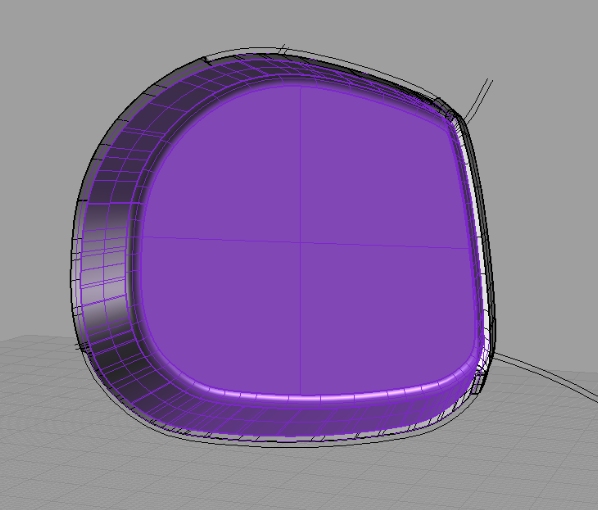
I’ve put that surface in purple layer.
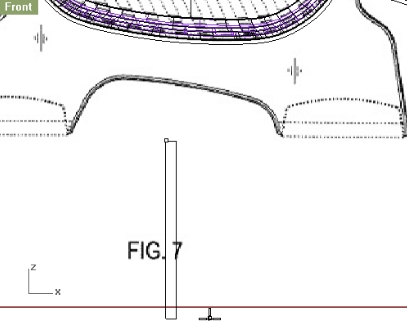
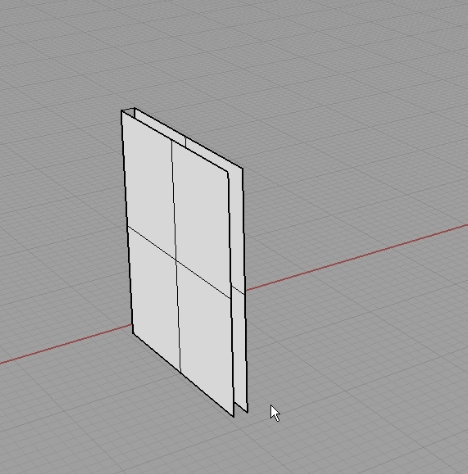
Because our blend surface didn’t quite done the great job, our edges aren’t planar anymore. So in Front viewport I have created a planar surface, and positioned it just so I can use it to cut off the bad planar curve:
So, when you trim off the part we don’t need, we can Extract an edge (DupBorder) out of that surface and be sure the extracted edge will be planar.
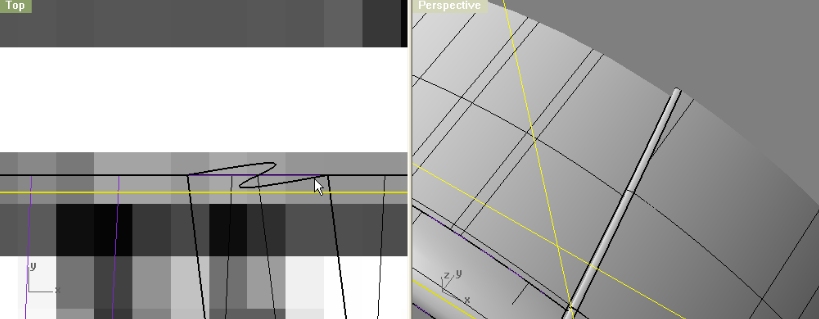
Ok, lets create those little angled holes for circulating air. Using simple line I measured the width of one hole 1.25 units. So, lets create a rectangle 1.25 units wide, and high enough.
Extrude that rectangle, and Explode it. Delete the upper and lower surfaces, as we won’t be needing them.
Blend the edges with BlendSrf.
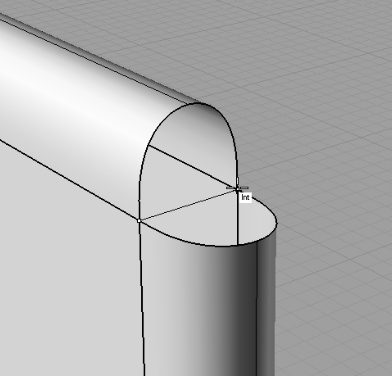
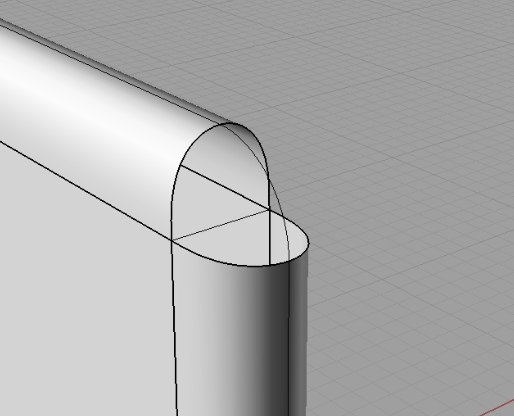
For the corners I used this method:
First, create a line between two corners of planar surfaces. Next, using Arc command make an arc starting from the line’s Mid point, and connect two blend surfaces (you might want to do that in Right Viewport). In the end, using Sweep1 command connect two edges of blend surfaces, and for rail select arc. Now, copy that corner surface 3 more times, and join the whole object.
Now we need to rotate and position our object.

Using Copy command, copy this object as many times as we need.
Now, we’ll do something we needed to do before, but no problem. We will connect the inner surface and outer surface and create a shell. As you probably remember, we created a line with DupBorder of our outer surface, and now we need to do the same for inner surface. So, use those two curves and make a Planar surface out of them (PlanarSrf). Join.
Now, with Boolean Difference command make the holes.
Off to the button creation. Make a circle:
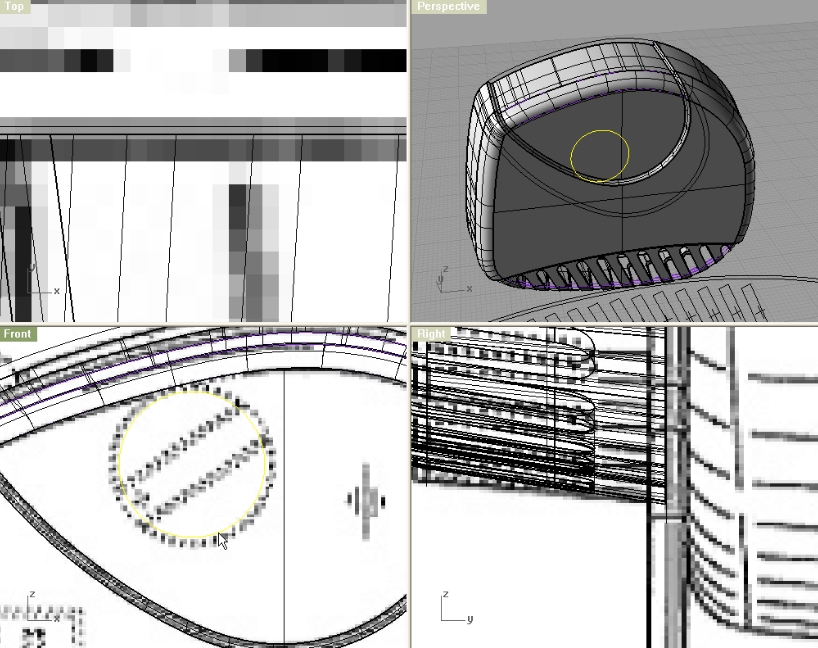
Offset it inside by 0.5 units, and Project both circles. Loft 2 projected curves, and trim.
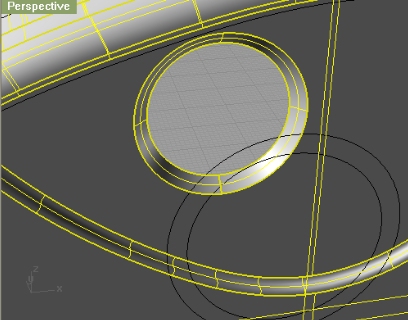
Close the hole with Planar Surface command and inner circle.
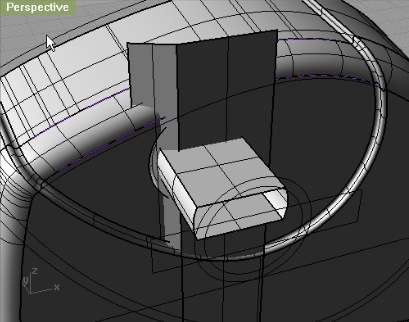
Next, make a rectangle, 2 units high, and position its center on the center of circle surface. Project that rectangle to that closed circle, and trim two projected curves (from rectangle) with circle edge.

Extrude and trim with extruded polyline created from top viewport.
Join surfaces, and fillet the edges (filletedge) with 0.3 radius.
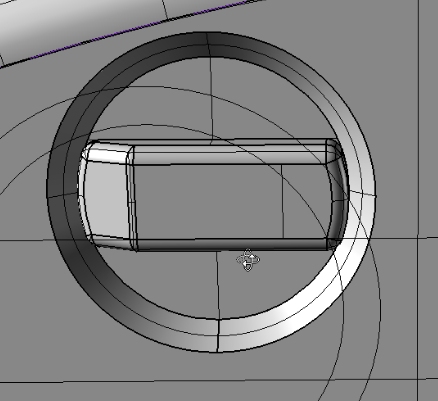
Rotate the handle so it fits the background image.
used 33 commands
Arc, BlendSrf, BooleanDifference, Circle, Copy, DupBorder, Explode, ExtrudeCrv, ExtrudeSrf, FilletEdge, Hide, InterpCrv, Join, Loft, Mirror, Move, NetworkSrf, Offset, PlanarSrf, PointsOff, PointsOn, Polyline, Rebuild, Rectangle, Rotate, Show, Spiral, Split, SrfPt, Sweep1, Sweep2, Trim


where are the blueprints?
sorry, forgot to include the link… thanks
Another excelent tutorial. Great job!
I had some troubles (image50) to fillet the edges of the circulator. I had to do the piece again and again… somehow it worked out.