
March 15th
Beginner, Modeling, Product design, Tutorials
This article has been viewed 71295 times. You can leave a response, or trackback from your own site.

Modeling Kent hair brush


STEP 2
In this step we will create everything else. Little handle details, and the pins…
Lets make that handle grip. Create a rounded rectangle, so using rectangle command (click on Rounded option) create one rounded rectangle. Using end or mid option in Osnap, align that rectangle on the mirroring line with near osnap option.
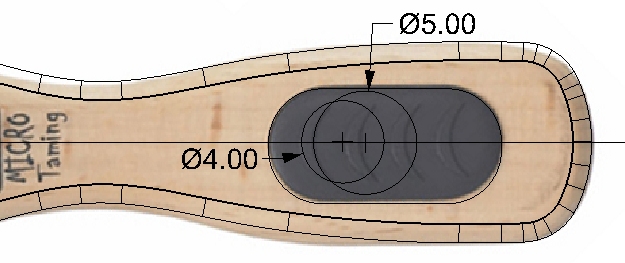
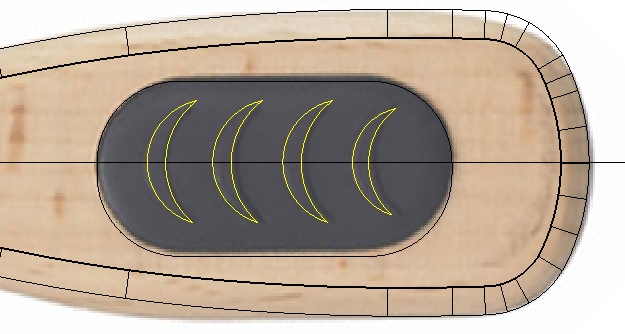
Using circle command, create two circles, one with 4 units diameter, and one 5. Trim off the parts you don’t need, and using Copy command, copy that 4 times. The last one is slightly scaled down with Scale command.
You need to project the rounded rectangle on the upper surface of your base model (Project command). Then, using rounded rectangle, make a hole in your base model. You’ll do that with makehole command. Prior to that, you need to make sure your surface normals are set to outside. Using Dir command, check that. If the arrows point to inside, then you need to change that with Flip command. Then, make a hole deep about one unit.
Next, I have isolated everything except that rounded rectangle curve (using Hide command, or you can put everything in one hidden layer) to make things easier.
Using PlanarSrf, create a surface out of that curve.
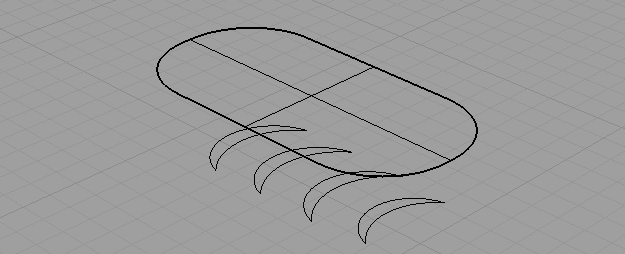
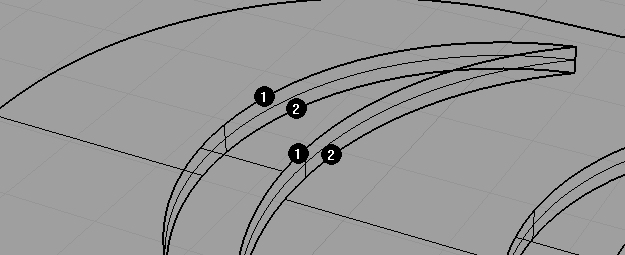
Align those moon-shaped curves so they are in the same plane as that surface, and using Split command, split the surface, and move the split surface up by 0.2 units. Using Loft command, connect the edges 1 and 2 like on the image:
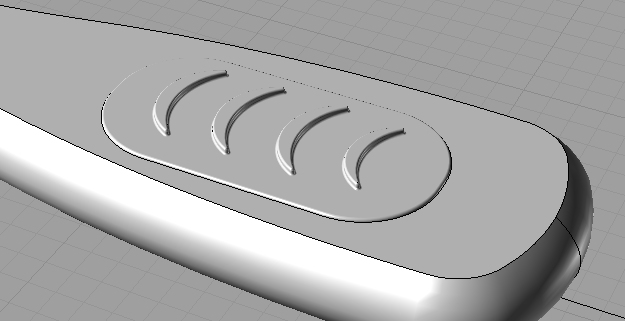
Next, Join those surfaces, and fillet the edges with FilletEdge command with 0.07 units. I have tried even bigger radii, but it didn’t work…
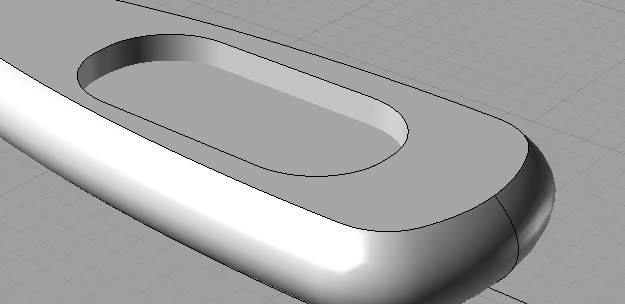
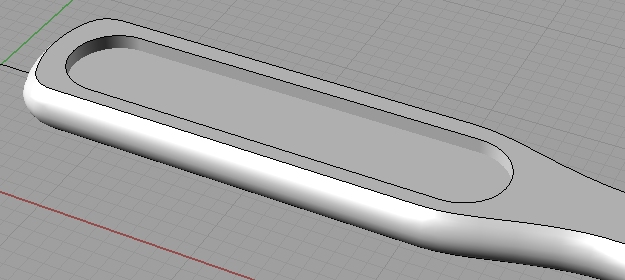
Next, extrude the outer edge, and fillet it with 0.1 units.
Again, like above, make a rounded rectangle, and Project it on the top surface. Using that projected curve, make a hole.
Using that projected curve (rounded rectangle), we will create a cushion for pins.


How do i hide the bitmap image afterwards?
there isnt a makehole command in rhino 3
yeah, sorry for that, MakeHole is since Rhino v4.0.
For hiding the bitmap go to View->Background Bitmap->Hide
“Next, using two closed curves, and this profile curve, create connecting surface. We’ll do that using Sweep2 command.”
havin’ trouble with that because i cant make a single closed curve out of that jumble of curves.
please help
this is pretty simple. There shouldn’t be a jumble of curves, there should only be two the same outline curves, and one (arc-like) curve. And when you do a sweep2 you need to specify those two outline (closed) curves as two rails, and that arc-like curve as cross section curve.
You should press F1 when in sweep2 command to get more help for that command.
how can i make the last step i have the pins and body but i cant connect pins and boday as you told …. could u help me
if you have a pin, and the cushion surface, then using OrientOnSrf position your pins at the crossings of 45 degree lines
hey thanks and i have ony 1 pin actually i made others manually could u tellme how did u do,? i fallow the steps but coundt do like u , i mean count ahve pins , i made them copy paste manuallt thanks
maybe I have confused you when I mistyped the command. It should be OrientOnSrf. So, when you start that command you get the options window in which you have Copy objects checkbox, and ther you check, so you copy and orient your pins on the “cushion” surface.
very interesting tutorial!
thanks for your work man 🙂
i had only one problem… it never let me fillet the lower edges of the grip handle
don’t know why..
the orient on surface is a great command ^^
never used before
Another great one. Why you didn’t made some kind of musician instrument, like guitar?
Very cool tutorial… i got it right the first time. Thanks!
thanks. its a very good beginning lesson. now i only have to memorise the commands.
Hey… Thanks for your video 🙂 Lets say I have made a cube, how can i divide the cube into different colours (around 3) when I render?